Showing posts with label recipes. Show all posts

Thursday, December 12, 2013

Salted Triple Chip Cookies, My New Favorite GF Flour Mixture, and a Gluten Free Cookie Swap


Salted Triple Chip Cookies are my favorite go to cookie to make.  I've been making them for about a year and I can promise you they are a huge hit wherever you bring them.  Or with yourself if you are sitting home eating them alone. No judgement over here, just know they make A LOT of cookies.  I originally got the recipe from my friend Mallory and instead of re-typing it, here is the link for you.  Seriously, make these.

The only thing you need to do to make these cookies gluten free is swap out the flour.  For a long time I used 3 cups of Bob's Red Mill All Purpose GF Flour and 1 and 1/4 cups rice flour.  This works, but I've been meaning to make the gluten free flour mixture suggested by the Gluten Free Girl for a year and I finally got around to it.  You need a food scale for this, and I realize that can be annoying, so don't worry about trying this yourself if you don't want to.  If you do want to, I mixed together 300 grams of millet flour, 300 grams of sorghum flour, 200 grams of sweet rice flour, and 200 grams of potato starch.  This makes a bit more than you need for the cookie recipe, so once it's combined just measure out 4 and 1/4 cups for the cookies.  I also used this mix to make corn bread and it worked really well in both recipes.  Shauna originally said to use 60% whole grains and 40% starches.  In an updated version she uses 70% whole grain and 30% starches.  I'll try this next time.  She also encourages you to play with different kinds of flours. See her post for more information.

I made these cookies for a gluten free cookie swap I went to last weekend.  The recipe really does make a lot of cookies so I also brought a dozen to a holiday party I had the night before and a dozen to a book club I had the next day.  Cookies for everyone!  Speaking of cookies for everyone, there were a whole lot of cookies at this gluten free cookie swap.  We had Jaffa Cakes from Candice, sugar cookies from Molly, and so many more.  There weren't even any duplicate cookies.  It was quite impressive really.  Mmm cookies.

Monday, November 26, 2012

Thanksgiving 2012

I didn't take any pictures while I was home.  This is from the summer.
But it is the view from my backyard.  Vermont is lovely.

Thanksgiving is my favorite holiday.  It's all about food and family.  I like it so much that this year I went to Canada for Canadian Thanksgiving just so I could celebrate the holiday twice.  Around Thanksgiving time most food bloggers post all sorts of new recipes for the holiday.  I didn't because we eat the same thing every year and I love it.  If it ain't broke, don't fix it.

Last year we had to adapt Thanksgiving to be gluten free.  With the experimenting last year, this year was a breeze.  My mom even made me homemade gluten free stuffing this year using Udi's bread since I've never tried a packaged GF stuffing I've enjoyed.  I bought a mini GF pumpkin pie at the local co-op since I really didn't need an entire full size gluten free pie laying around.  It was pretty delicious.  We also had the creamed spinach, sweet potatoes, and mashed cauliflower again.  This year we added brussels sprouts to the menu, which I love.  I also had Almond Nut Thins around for all the cracker and cheese appetizers.

I spent six days at home laying low, eating good food, and visiting with family and friends.  What could be better?

Monday, November 19, 2012

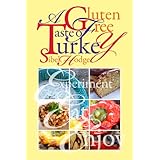
A Gluten Free Taste of Turkey - ebook review


Last Monday I got an email from Sibel Hodge asking if I'd like to review her cookbook: A Gluten Free Taste of Turkey.  My first thought was "heck yes".  My second thought was "...what is Turkish food?"  I didn't have to wonder for long because within a few hours I had a copy of Sibel's ebook.

Sibel has dual Turkish Cypriot and British nationality.  She started cooking gluten free for her husband who has Celiac.  I really enjoyed this little anecdote in her introduction about getting to know her husband:

‘I’m coeliac,’ he admitted sheepishly, just after I’d invited him round for dinner early on in our relationship.

‘Coeliac?’ I gave him an odd look, thinking he was trying to prepare me for some bizarre sexual quirk that sounded a bit dodgy.

Well, I breathed a huge sigh of relief, I can tell you, when he explained to me he had a disease that meant he was unable to eat gluten, not someone who wanted to dress up in lederhosen and be slapped with stinging nettles. Then I thought, unable to eat gluten? That must be really horrible, but how difficult can it be to cater for that? Well, not as easy as I first thought…

A Gluten Free Taste of Turkey is filled with funny little notes as well as a lot of great recipes.  It is broken into Meze, Soup, Salad, Egg Dishes, Pasta, Vegetable Dishes, Meat Dishes, Seafood, Dessert, Bread, and Drinks.  I like it because most of the recipes are naturally gluten free.

I couldn't decide on just one dish, so I made a Turkish feast (shout out to my boyfriend who eats everything I cook, even when I clearly have no idea what I'm doing).  I started with a yogurt and cucumber dip served with fresh veggies and individual corn bread.  I love yogurt dip as a dip, but also on main dishes like chicken and rice.  I'm so happy that now I know how to make it on my own.  The individual corn bread reminded me more of corn fritters than of what I would traditionally call corn bread.  But hey, who doesn't like a corn fritter?

I made two main dishes: Aubergine Bake and Chicken Casserole.  Aubergine is what we call eggplant in the US. According to Sibel, eggplants are eaten daily in one form or another in Turkey and North Cyprus.  I haven't cooked with eggplant in awhile so it seemed like a good opportunity.  Both of these recipes call for mozzarella melted on top.  How can you go wrong with melted cheese on top?  The answer is, you can't.

Other recipes I'd like to try include: Hummus, Sexy Cabbage, Bean Salad, and Beetroot Salad.

Overall I like this cookbook.  Sibel is funny and it's nice to have recipes on hand from a different type of cuisine.  A Gluten Free Taste of Turkey is available on Amazon for $4.99 and will be available in paperback soon.

Thursday, February 9, 2012

A First Time For Everything - Bread


The thought of making bread scares me.  Regular or gluten free.  It just seems too difficult.  So difficult that I had never attempted it - except for one unfortunate incident with a bread machine in the 90's that I'd rather not relive.

As all you gluten free folks out there know, there is an extreme lack of good gluten free bread.  There is even a lack of decent gluten free bread.  For the past year I took this to mean I just shouldn't eat bread.  But sometimes, just sometimes, I get a craving for a sandwich and I curse gluten while simultaneously having a pity party.

In addition, my brother has been hounding me to figure out to make great bread.  Hounding might be a strong word.  Let's go with encouraging.  So what we have is bad bread, me wanting a sandwich for lunch, and my brother encouraging me to make bread.  Then my friend Mallory sends me an email with a link to the "best ever gluten free sandwich bread".  Ok, this was it.  Time to put on my big girl apron and get to work.

This recipe calls for several things I never use like yeast, almond milk, and apple cider vinegar.  It's a vegan recipe so I needed three "flax eggs" and had to buy ground flax seed.  It also calls for xanthan gum so I finally broke down and bought some.  Normally I would omit it, but if I was going to attempt to make the best ever gluten free sandwich bread, I didn't want to be taking any chances.  Same with the vegan parts.  Could I have used real eggs and milk instead?  Maybe, but I've never made bread before, so get off my back.

Without further ado, here's the recipe from Clean Eating Chelsea.  I copied it right from her site and followed it exactly (mostly).

Best Ever Gluten Free Sandwich Bread
  • 1 cup brown rice flour
  • 1/2 cup quinoa flour
  • 1/2 cup oat flour
  • 1/2 cup potato starch (not potato flour)
  • 1 tbsp. yeast
  • 1 tbsp. sugar
  • 1/2 cup unsweetend almond milk
  • 1 cup water
  • 2 tsp. xanthan gum
  • 1 tsp. salt
  • 3 flax eggs
  • 1 tbsp. olive oil
  • 3 tbsp. honey (optional)
  • 1 tsp. apple cider vinegar
Instructions:
1. Proof the yeast: Heat up 1/2 cup almond milk and 1 cup water to approximately 105-110 degrees. To do this, I microwaved my liquid for 70 seconds and checked the temperature. Once the liquid is heated, add 1 tbsp. active yeast and 1 tbsp. sugar – give it a quick stir and set aside until foamy (~5 minutes).

2. Make your flax eggs: In a small bowl or mug, mix 3 tbsp. ground flax seed with 9 tbsp. (1/2 cup + 1 tbsp.) water. Give a quick stir and set aside until thickened (~3-4 minutes).

3. Mix your dry ingredients: In a stand mixer bowl, combine 1 cup brown rice flour, 1/2 cup quinoa flour, 1/2 cup oat flour, 1/2 cup potato starch, 2 tsp. xanthan gum, and 1 tsp. salt. Toss for approximately 10 seconds with a spatula or fork to combine the ingredients.

4. Once your flax eggs have thickened, add 1 tbsp. olive oil, 3 tbsp. honey, and 1 tsp. apple cider vinegar to the eggs. Whisk until ingredients are combined and set aside.

5. Make your dough: By this time, your yeast mixture should be foamy. If not, you might have killed the yeast due to the water being too hot. If this is the case, just start over with new yeast! If your yeast is good to go, pour the yeast and the flax egg mixture into the flour. Using a dough hook attachment, set your mixer to low-medium speed and mix for 3-4 minutes.

6. Let it Rise: Pour your dough into a greased 9×5 bread pan, cover it with a kitchen towel, and let it hang out in an UNHEATED oven for about an hour. Once the dough has risen to the top of the pan, take the bread pan out of the oven.

7. Cook to perfection: Preheat your oven to 375 degrees Fahrenheit once the dough has been taken out of the oven. Cook, uncovered for 45-50 minutes. The outside should be golden brown. Let bread cool completely before cutting into slices.


That's it: bread.  I only let my dough rise for half an hour because it was already well over the top of the pan.  Then, I checked my loaf after 40 minutes and the top was golden brown so I took it out.  This was a mistake.  While the flavor of the bread was good, it was a bit underdone.  How are you supposed to know when bread is done though?

While I think this would be good bread had I cooked it long enough, it is still a bit dense, as gluten free bread often is.  It's more the consistency of banana bread than fluffy sandwich bread.  How do you make fluffy gluten free sandwich bread you ask?  No one has figured it out.  I'm telling you, really good gluten free bread doesn't exist yet.  Sure, there are good ones out there, like my personal favorite, Canyon Bakehouse, but honestly, no gluten eating person is throwing down their bread to eat ours.

My brother has informed me I need to keep trying.  According to him, this is just the first in many bread attempts.  I need to figure out the science of it.  The science, as I understand it, is gluten makes things fluffy.  No gluten, no fluffy.  I'll work on it though.  Maybe.

Muddy Buddies

Their picture was prettier than mine.


I love the Super Bowl. Mostly for the food, drinks, commercials, half time show, and feeling oh so very American. And did I mention the food?

I had the usual nachos and veggies with dip at this year's super bowl extravaganza, but I also made muddy buddies for the first time. I've been wanting to make these for a long time but I knew, without a doubt, I was not to be trusted with these myself. I don't think I've even had muddy buddies since middle school, they certainly never made an appearance at my house growing up, but I just knew I would love them (and eat excessive amounts of them).

Well, I was right. And for good reason. Muddy buddies are delicious, and addicting. I copied the recipe right off the corn chex box. I omitted the vanilla because I didn't have any on hand. I also used the whole box of cereal, because really, why not?


These are a great snack, especially for kids, or adults like myself that are basically kids.  One party attendee said she wanted to pour some milk on them and eat it like cereal.  This is honestly not a bad idea.  However you eat them - enjoy!


Chex Muddy Buddies


Ingredients

9cups Rice Chex®, Corn Chex® or Chocolate Chex® cereal (or combination)
1cup semisweet chocolate chips
1/2cup peanut butter
1/4cup butter or margarine
1teaspoon vanilla
1 1/2cups powdered sugar


.
Preparation Directions
1.Into large bowl, measure cereal; set aside.
2.In 1-quart microwavable bowl, microwave chocolate chips, peanut butter and butter uncovered on High 1 minute; stir. Microwave about 30 seconds longer or until mixture can be stirred smooth. Stir in vanilla. Pour mixture over cereal, stirring until evenly coated. Pour into 2-gallon resealable food-storage plastic bag.
3.Add powdered sugar. Seal bag; shake until well coated. Spread on waxed paper to cool. Store in airtight container in refrigerator.

Sunday, January 22, 2012

Oh Hi

Sorry I've been missing.  I've been pretty busy with stuff I'm not quite ready to share with you yet.  It's big though, just you wait.  I have been cooking and baking up a storm though.

There are two things I'd like to recommend you make.

First, I made this chicken salad last Monday from With Style & Grace.  I mixed it with greens and had it for lunch every day last week.  It was a nice change from whatever it is I usually eat for lunch.  Next time I'll use grapes instead of raisins.

From With Style & Grace

Next, this weekend I made blueberry scones.  I had never made scones before, but I really like them.  Scones often get a bad rap, but they are perfect with a cup of tea.  They are also, as you may remember, a large part of the reason I got fat in college.  Oops.

From Celiac Teen

Lauren used currants, but I don't like currnts so I used blueberries.  This recipe was another reason I needed a food scale.  If you don't have one, I'm sorry, because I have no idea what this would be in cups.

Ok, back to my busy life now.

Monday, January 9, 2012

Gluten Free Oreos


Ok.  I did it.  I broke down and bought a food scale.  I used to be annoyed by all the gluten free recipes posted in grams.  Mostly annoyed because I wanted to make them and couldn't.  And then I asked for 10 different kinds of flour for Christmas and realized that without a food scale I couldn't use the flour in all these recipes that I've been wanting to make.  So now, here's my first recipe in grams.  I'm really sorry.

Oh, it's also my first recipe using sweet rice and teff flour.  There will be many more different flours to come.

I adapted this recipe from the Gluten Free Girl.

Ingredients:
For the cookies:
80 grams sweet rice flour
60 grams white rice flour
35 grams teff flour
1/2 cup unsweetened cocoa powder
1 teaspoon baking soda
1 teaspoon baking powder
1/4 teaspoon salt
1 cup sugar
10 tablespoons butter, softened
1 large egg

For the  filling
:
1 stick butter, softened
2 cups confectioners’ sugar
2 teaspoons vanilla extract

Directions:
1) Preheat the oven to 375. Line a baking sheet with parchment paper.

2) In a large bowl combine the flours.  Whisk in the cocoa powder, baking soda, baking powder, salt, and sugar.

3) On low speed, beat in the butter and egg.  It will look dry, but keep mixing, it will come together.

4) Scoop 2 teaspoons of batter and form a ball.  Flatten the dough in the palm of your hand into a round disk and smooth the edges.  Place on prepared cookie sheet.

5) Bake cookies for 5 minutes.  Turn baking sheet 180 degrees and bake for another 5 minutes.  Remove and allow to cool.

6) Beat together all frosting ingredients until smooth.

7)  When the cookies are cool spread some frosting onto one cookie and then top with another.  Repeat.

That's it.  Oreos.

Tuesday, January 3, 2012

Snickerdoodles


Snickerdoodles are another thing we made in my high school F&CS class that I have continued to make over the years.  As you probably don't remember, when I first went gluten free I was worried I'd never be able to make these cookies again and Richie Fries would take back his marriage proposal, even if he didn't remember making it.  Well, don't worry, I made these last weekend and they were just as good as their gluten filled counterparts.

I used Cup4Cup for this recipe.  It worked really well.  I also used the cream of tartar for the first time.  I usually omit it because I've never had any before.  Quite frankly, I didn't notice much of a difference with it in there, so feel free to go either way on that one.  Remember, this recipe was originally gluten filled, so if you aren't gluten free go ahead and use regular flour.

Ingredients:
Cookie -
1/2 cup (1 stick) butter, softened
1/2 cup white sugar
1/3 cup brown sugar
1 egg
1/2 tsp vanilla
1 1/2 cups GF flour
1/4 tsp baking soda
1/4 tsp cream of tartar
1/4 tsp salt

Topping -
3 T white sugar
1 T cinnamon

Directions:
1) Pre-heat oven to 300 degrees (this is not a typo)

2) In a large bowl cream together the butter and sugars with an electric mixer on high speed.  Add the egg and vanilla and beat until smooth.

3) In another bowl combine the flour, baking soda, cream of tartar, and salt.

4)  Pour the dry ingredients into the wet ingredients and mix well.

5) In a small bowl combine the sugar and cinnamon for the topping.

6) Roll dough into one inch balls.  Roll each ball in the cinnamon sugar mixture and place on an ungreased cookie sheet.

7) Bake for 12 minutes - no more.  They will look a little underdone, but they'll crinkle and set perfectly as you let them cool.

Enjoy!  Let me know if these get you any marriage proposals.

Saturday, December 24, 2011

Scalloped Potatoes


I love scalloped potatoes.  We had them tonight for Christmas Eve dinner along with some ham, green beans, and creamed spinach.  I wouldn't exactly call scalloped potatoes a healthy dish, but they sure are good.  This recipe is adapted from this recipe found online.

Ingredients: 
1 medium onion, chopped
5 tablespoons butter
5-6 russet potatoes peeled and sliced thinly
3 tablespoons rice flour 
1 1/2 cups milk
salt and pepper to taste 
1 1/2 cups grated sharp cheddar cheese
Directions:
1) In a medium pan saute 2 tablespoons of butter and onions until soft.
2) In a small sauce pan, melt the remaining 3 tablespoons of butter and blend in rice flour. 
3) Whisk in the milk.  Season with salt and pepper
4) Cook sauce on medium heat until smooth, stirring occasionally with the whisk.
5) Reduce heat and stir in onions and 1 cup of cheese.
6) Place a third of the sliced potatoes in a lightly greased casserole dish.
7) Pour a third of the cheese sauce over the potatoes, making sure they are all covered.
8) Repeat twice: layer of potatoes, layer of cheese sauce, layer of potatoes, layer of cheese sauce.
9) Sprinkle with the remaining 1/2 cup of cheese.
10) Bake uncovered for about 1 hour at 350 degrees.

Enjoy and Happy Holidays!

Here's another picture for you.

Sunday, December 18, 2011

Peanut Butter Buckeyes


We made these treats in my high school Family and Consumer Science class (Home Ec.).  You should probably also know that in 7th grade Tech Ed (Wood Tech) Emily Warman and I built a tiny wooden bridge that held more weight than Travis Hulbert's.  No big deal.

Back to these treats.  I'm pretty sure these weren't on our curriculum, but Keri Hart brought them in one day and our teacher said we could make them.  I saved the original recipe and used it to make these today.  They aren't technically buckeyes because the entire ball is covered in chocolate, but you get the point.

This recipes makes about 40.  It's very easy to half if you don't want so many.

Ingredients:
1 stick of butter, softened
2 cups confectioner's sugar
2 cups peanut butter
3 cups Gluten Free Rice Krispies
12 ounce bag of semi-sweet or dark chocolate (depending on your preference)

Directions:
1) In a large bowl combine the butter, confectioner's sugar, peanut butter, and Rice Krispies.  It's easiest to use your hands for this.

2) Form into tight one inch balls.

3)  Melt chocolate using a double broiler or in the microwave.  Using a fork or spoon, coat the peanut butter balls in chocolate and place on wax paper.  Refrigerate to harden.

That's it.  No baking required.  Enjoy!

Friday, November 25, 2011

Creamed Spinach


Creamed Spinach is a holiday staple around my house.  My mom makes it every Thanksgiving, Christmas, and sometimes Easter.  I've been helping her with it for years, but it's one of those dishes she doesn't have a recipe for.  This year we noted what we used so I could share it with you.  We used to make it with wheat four, but when I had to go gluten free we switched to rice flour.  It tastes the same.  I hope your family enjoys it as much as ours.

Ingredients:
4 packages frozen chopped spinach
1 small onion, chopped
3 tablespoons butter
3 tablespoons rice flour
1 1/4 cups milk
salt and pepper to taste
1 tablespoon sugar

Directions:
1) Cook the spinach according to the directions on the package.  Drain well.
2) Melt the butter in a large saucepan over medium heat.  Add the onion and saute until soft.
3) Add the flour to the onion mixture, whisk until smooth.
4) Slowly add the milk, stirring constantly.  Add the salt and pepper.
5) Keep stirring and allow to thicken slightly, about three minutes.
6) Stir in the cooked spinach and sugar. Heat throughout and serve.

Thursday, November 24, 2011

Sweet Potato Puree

From allrecipes.com
My mom has made Sweet Potato Puree for the last two Thanksgivings.  They are easy to make, not too sweet, and are a good side dish.  The recipe is right off allrecipes.com.  You can find it here.  I'm using their picture too because I forgot to take one of my own.

We used 6 large sweet potatoes and 2% milk instead of whole milk.  If I was making it on my own I'd probably use skim milk because that's what I have in my apartment.  I'd also probably use a little less butter, just because 6 tablespoons seems like a lot.  Otherwise, this is a great recipe that I'm sure will be making appearances at many of our Thanksgivings to come.

Wednesday, November 23, 2011

Smart Grain Sage Stuffing


I picked up this stuffing at G-Free NYC.  I made it for our pre-Thanksgiving day feast tonight and I was very happy with it, especially since the gluten free stuffing I tried last year pretty much sucked.

To make the stuffing I started by sauteing up some onion, mushrooms, and celery.  Then, in a large pot, I melted half a stick of butter into a quarter cup of gluten free chicken broth.  To that I added the sauteed vegetables and package of sage stuffing.  I combined it all and then we cooked it right in the turkey.  It started to crumble a little as I was taking it out of the bird, but it held up pretty well.  I'll be bringing left overs of it to our real Thanksgiving dinner tomorrow so I don't have to miss out on Thanksgiving day stuffing.

I can't seem to find a website for this company, but I'd recommend it for any gluten free holiday.

Mashed Cauliflower


I saw this recipe for Mashed Cauliflower on Elana's Pantry.  I love mashed potatoes, but sometimes they can be a bit heavy.  For the pre-Thanksgiving meal we had tonight, I wanted to try something a bit lighter.  This recipe is a nice substitute.  It has a great flavor, is really easy to make, is much healthier than mashed potatoes, and is still a good vehicle to hold gravy.

Ingredients:
1 large head of cauliflower
2 tablespoons butter
salt and pepper to taste

Directions:
1. Steam the cauliflower until very tender
2. Put the cauliflower, butter, salt and pepper in a large bowl and mash (or puree)
3. Top with some more butter and parsley if you'd like

That's it.  Enjoy!

Gluten Free Thanksgiving!


Tomorrow we are off to my aunt's house for Thanksgiving.  My mom wanted to have turkey left over at our house, so we did a pre-Thanksgiving dinner tonight.  The best part of tonight's dinner?  The entire meal was gluten free!

Tonight we had:
Turkey
Gluten Free Gravy*
Gluten Free Stuffing
Mashed Cauliflower
Broccoli
Gluten Free Pumpkin Pie

Tomorrow we are making and bringing:
Creamed Spinach
Sweet Potato Puree
Gluten Free Apple Crisp

Everything we bring tomorrow will be gluten free as well.  I'll bring left over stuffing and gravy to have with my meal tomorrow.  I'll also bring some gluten free crackers for the appetizers.

Thanksgiving is my favorite holiday and I'm very happy that my family is being so accommodating to my needs.

Happy Thanksgiving everyone!

*I'm not posting a recipe for the gravy because my mom makes it and I honestly don't know how.  I do know she made it gluten free by using rice flour instead of wheat flour to thicken it.

Sunday, October 30, 2011

How to Hard Boil an Egg


When I was first diagnosed with Celiac my mom promptly ordered me three gluten free cookbooks off Amazon.  They were in my hands and filled with post it notes within a few days.  In Jacqueline Mallorca's The Wheat-Free Cook there is a page in which all she has is a brief description of how to hard boil eggs.  I remember looking at that page and realizing that, at age 25, I had no idea how to hard boil an egg.  I'm so glad I know how to now, and I wanted to make sure you know how to too.

In Jacqueline's own words, here's all you have to do:

Perfectly Cooked Hard-Boiled Eggs
Place the eggs in a saucepan, cover with cold water, and bring to a boil.  Cover the pan, remove from the heat, and let stand for 12 minutes.  The yolks as well as the whites will be firm all the way through, and just right.

That's it.  When the eggs are done I drain the hot water, run some cold water over them, drain that, and then put them right in the fridge.  Cooking up a few on Sunday night makes for a very easy weekday breakfast.  I grab two on my way out the door and eat them at my desk with salt and pepper.  They keep for 3-5 days.

What's everyone else eating for breakfast?  You are eating breakfast, aren't you?

Wednesday, October 26, 2011

Crustless Quiche


What is the difference between a quiche and a frittata?  Honestly, I had to Google that and I'm still not sure I know the answer.  Especially when the quiche is crust-less.  But what I got from Google is that quiches have a bunch of milk in them and frittatas don't.  Either way, they are both good.

Worried about the gluteny crust on a quiche?  Don't be, you can just make it without a crust!  I found this recipe in The Gluten-Free Bible and tried it out last night.  I'll definitely be making this, and variations of it, again in the future.

Ingredients:
2 cups sliced asparagus (1/2 inch pieces)
1 red pepper, finely chopped
1 small onion, finely chopped
1 cup milk
2 tablespoons rice flour
4 eggs
1 cup cubed ham
2 tablespoons dried basil (fresh if you have it)
1/2 teaspoon salt
1/4 teaspoon pepper
1/2 cup shredded cheddar cheese

Directions:
1) Preheat oven to 350.  Combine asparagus, bell pepper, onion, and 2 tablespoons water in a microwavable bowl.  Cover with waxed paper, microwave on high for 2 minutes, drain the excess water.

2) Whisk the milk and rice flour in a large bowl.  Add in the eggs.  Stir in the vegetables, ham, basil, salt and pepper.  Pour into a 9 inch pie pan.

3)  Bake for 35-40 minutes.  Sprinkle the cheese over the quiche and bake for another 5 minutes - or until the center is set and the cheese is melted.  Let stand 5 minutes before serving.

The good thing about quiches and/or frittatas is that you can pretty much put whatever you want in there.  Veggies, meat, cheese.  Next time I might try broccoli.

Anyone know the difference between a quiche and a frittata?  Suggestions for favorite ingredients?

Monday, October 17, 2011

Gluten Free Pumpkin Granola


Sunday morning I woke up to a recipe for pumpkin granola posted on my facebook page from an old college roommate.  Sunday afternoon I made this granola by Lisa at With Style and Grace.  Right after the granola I made the pumpkin spice muffins.  It was a day of pumpkin.

I love granola.  An endless supply of "low fat" cafeteria granola greatly aided in making me fat in college.  Due to the fact that it is actually not as good for you as you'd like to think, and that gluten free granola is absurdly expensive, I tend to steer clear of it except every once in a while.  But I couldn't pass up the chance to make it on my own.  I could control the amount of fat that went into it and it would be much cheaper than buying it.  Win win.

And without further ado, here's the how:

Ingredients:
4 cups gluten free oats (if you aren't gluten free make this recipe using regular oats)
1 cup chopped almonds
1 tsp pumpkin pie spice
1 tsp cinnamon
3/4 tsp salt
1/2 cup packed brown sugar
1/2 cup pumpkin puree
1/3 cup applesauce
2 tablespoons maple syrup (as a Vermonter, I beg you to use the real stuff)
1 tsp vanilla
1 cup dried cranberries

Directions:
1) Pre-heat oven to 325.  Line 2 baking sheets with parchment paper.

2) In a large bowl combine the oats, almonds, pumpkin pie spice, cinnamon, and salt.  In another bowl combine the brown sugar, pumpkin, applesauce, maple syrup, and vanilla.  Add this mixture to the oat mixture until everything is coated.

3) Spread the granola mixture onto the baking sheets.  Bake for 20-25 minutes, then stir to ensure it bakes evenly.  Bake for another 20 minutes.

4) Remove from the oven and let cool before mixing in the cranberries.  Store in an airtight container.

I was pretty amazed at how easy this was to make.  Lisa bakes hers in two batches and suggests you either do the same or use two sheets.  I must admit I only own one baking sheet and was too lazy pressed for time to do two batches.  It was probably a mistake because the granola didn't turn out quite as crunchy as I like, but it was still good, don't worry.  Not only was it good, but now I have a ton of it!

Speaking of having a ton of it, you might notice there is no oil in this recipe.  That's good for not making you fat.  It has a pumpkin taste, but not overbearingly pumpkin.  Who knew making granola could be so easy?  Thanks Margaret!

Pumpkin Spice Muffins with Cream Cheese Filling

Photo compliments of my roommate.
I came across this recipe on Quick Feet, Good Eats recently and have been dreaming about it ever since.  Apparently I really like cream cheese in my baked goods.  I made these yesterday with a few adjustments to the original recipe and they were pretty great.  Here's how I made them:

Ingredients:
Filling:
8 ounces cream cheese, softened
1 cup confectioners sugar

Muffins:
3 cups GF flour (I used 2 cups Bob's Red Mill All Purpose and 1 cup brown rice)
1.5 tsp cinnamon
4.5 tsp pumpkin pie spice
1 tsp salt
1 tsp baking soda
4 eggs
1.5 cups sugar
2 cups canned pumpkin
1 cup applesauce
1/4 cup oil

Topping:
1/4 cup sugar
2 tablespoons GF flour
1 tsp cinnamon
2 tbsp cold butter, cut into small pieces

Directions:
1) In a medium bowl beat the softened cream cheese and confectioners sugar until smooth.  Put mixture in the freezer while you prepare the muffins.

2) Pre-heat oven to 350.  In a medium bowl combine the flour, cinnamon, pumpkin pie spice, salt, and baking soda. 

3) In a larger bowl beat together the eggs, sugar, pumpkin, applesauce, and oil.  Stir the flour mixture into the liquid mixture.  Set aside.

4) To make the topping combine the sugar, flour, and cinnamon.  Using a pastry blender, two forks, or your fingers, work the butter into the mixture until it's crumbly.

5) Grease 24 muffin tins.  Fill each tin 1/3 of the way with the pumpkin mixture.  Put a dollop of the cream cheese mixture into each muffin tin, then cover with more of the pumpkin mixture.  Sprinkle some of the topping mixture over each muffin.

6) Bake for 20-25 minutes.

That's it.  They are especially good straight out of the oven when the cream cheese is still gooey.  Enjoy!

Wednesday, October 12, 2011

Butternut Squash Soup


With my lack of recipes you might think I don't cook that often.  Well, that's kind of true.  It's especially true in the summer when I mostly eat fresh fruit with cottage cheese or plain yogurt.  Also, living in a city with so many food options, I find myself eating out a fair amount.  But as the season starts to turn to fall, I start to turn to soup.

My mom makes this delicious butternut squash soup.  We ate it while I was home last weekend and then I made it this week.  Easy, healthy, and lasts for days.  It's easy because we use pre-cut squash.  If you have the time and energy to do it yourself, I am very impressed.  The amount of the veggies isn't so important, so don't worry if you don't have it exact.

Ingredients:
2 packages of pre-cut butternut squash
2 medium russet potatoes
1 package mini carrots (1 pound I think)
1 large onion
2 cloves of garlic
4 cups gluten free vegetable broth
2 cups cheddar cheese
salt and pepper to taste
parsley for garnish

Directions:
1) Preheat oven to 425.  Chop the potatoes and onion into large pieces (similar in size to the butternut squash).
2) Put all vegetables and vegetable broth in a large baking dish.  Cover and bake for one hour.
3) Transfer the roasted vegetables and broth into a large pot and blend with an immersion blender.  Or blend in a regular blender before transferring to the pot.
4) Stir in the cheese and shake in a bunch of salt and pepper to taste.  Garnish with some parsley.

Serve with warm bread.